
This is a burp suite beginners tutorial. Burpsuite is a collection of tools, written in Java used to perform various network security related tasks.
Burpsuite can be used as a basic http proxy to intercept traffic for analysis and playback, a web application security scanner, a tool to perform automated attacks against a web application, a tool to spider an entire website to identify attack surface and a has a plugin API with a ton of third party addons available!
In this basic burp suite tutorial I’ll explain how to use the basic features available in the community edition (the free version). If you haven’t already, download burpsuite from the portswigger site: https://portswigger.net/
After running the installer, select “new temporary project”, followed by “use burp defaults”.
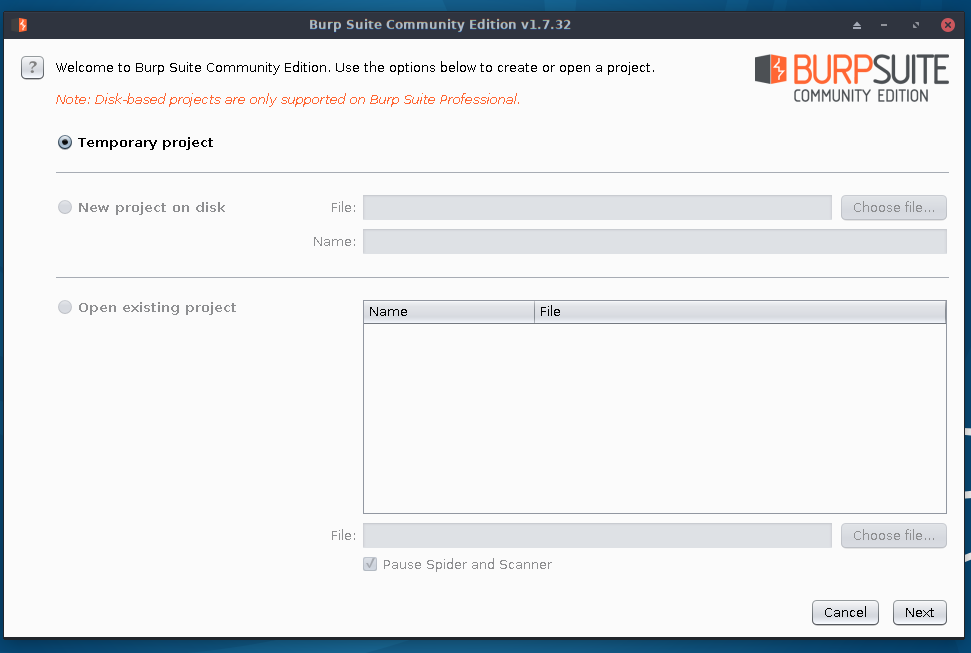
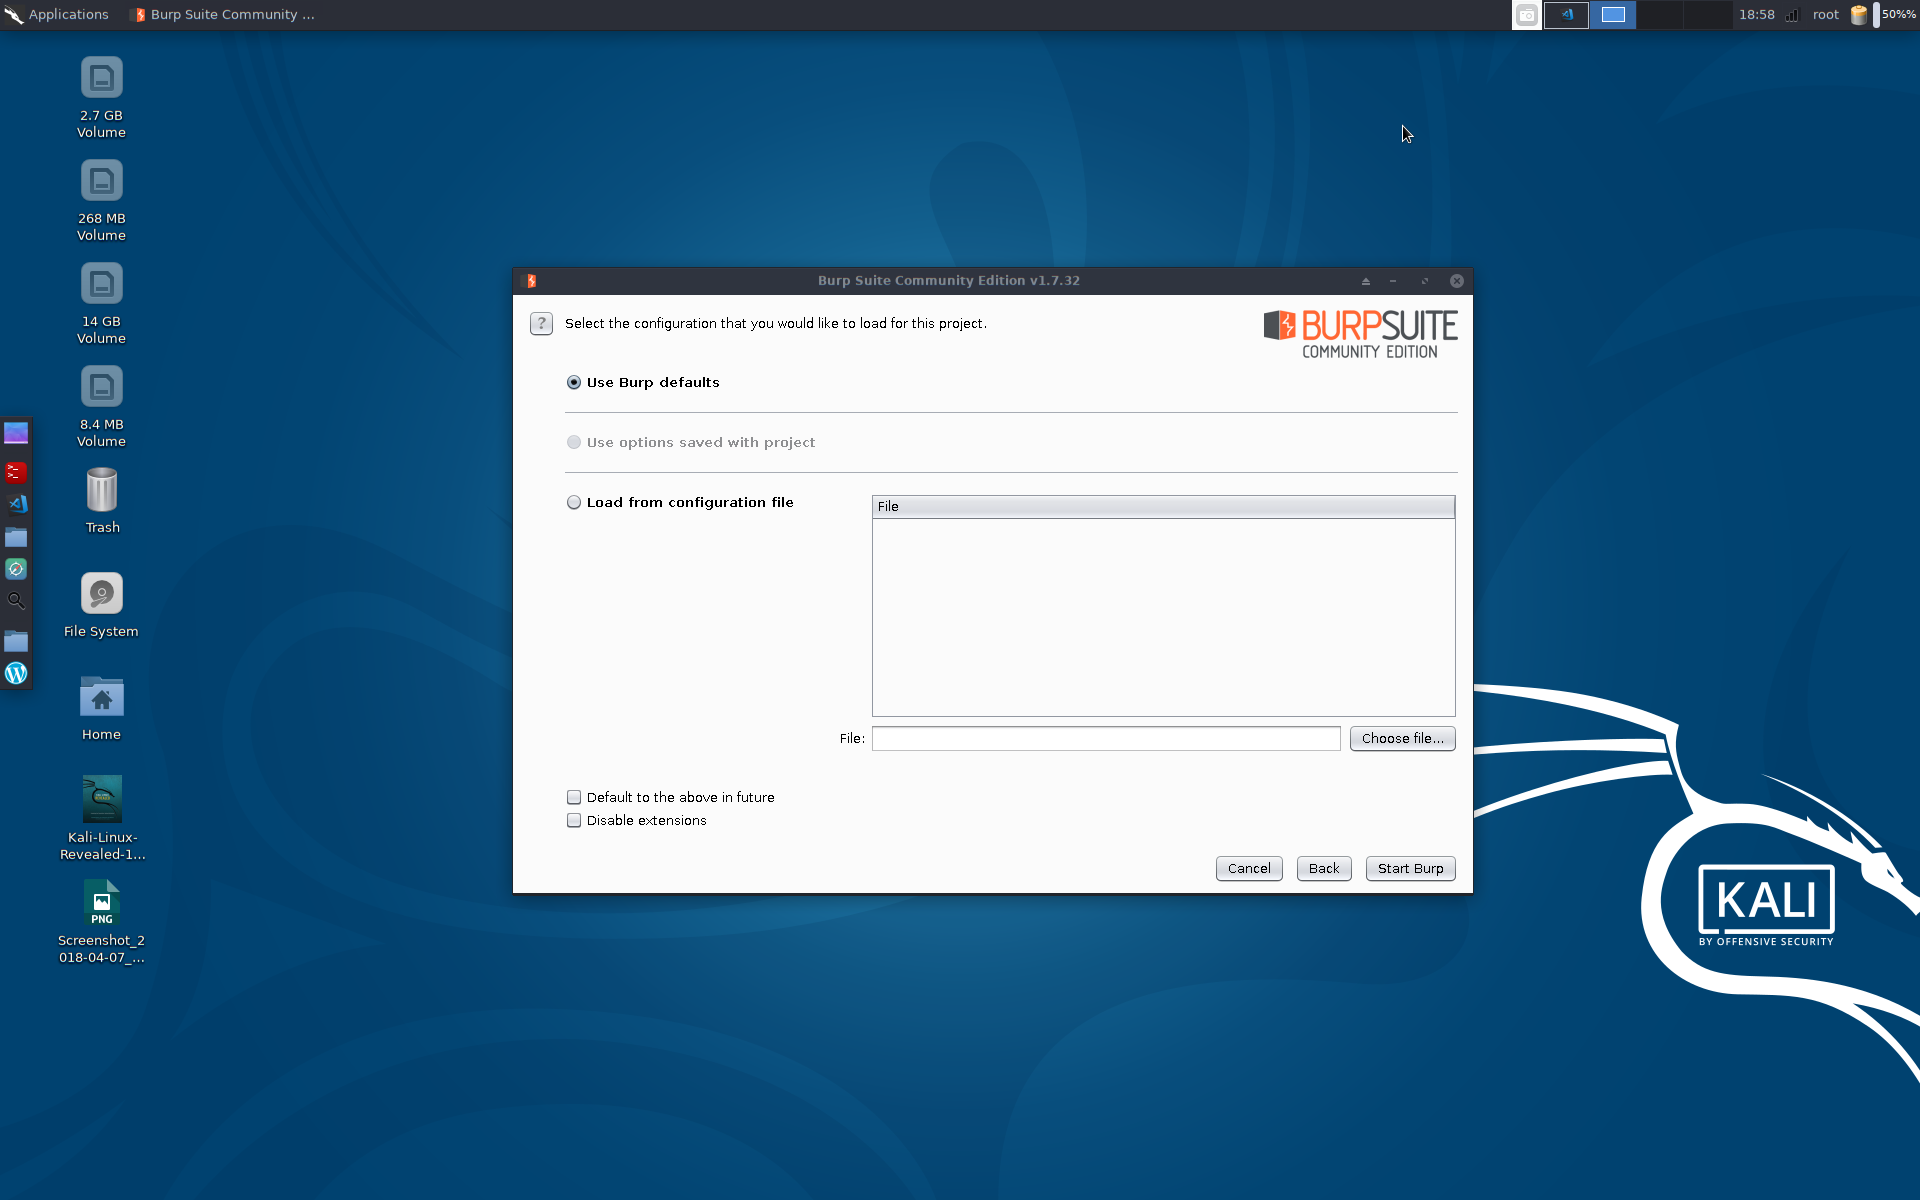

- Click “Start Burp”
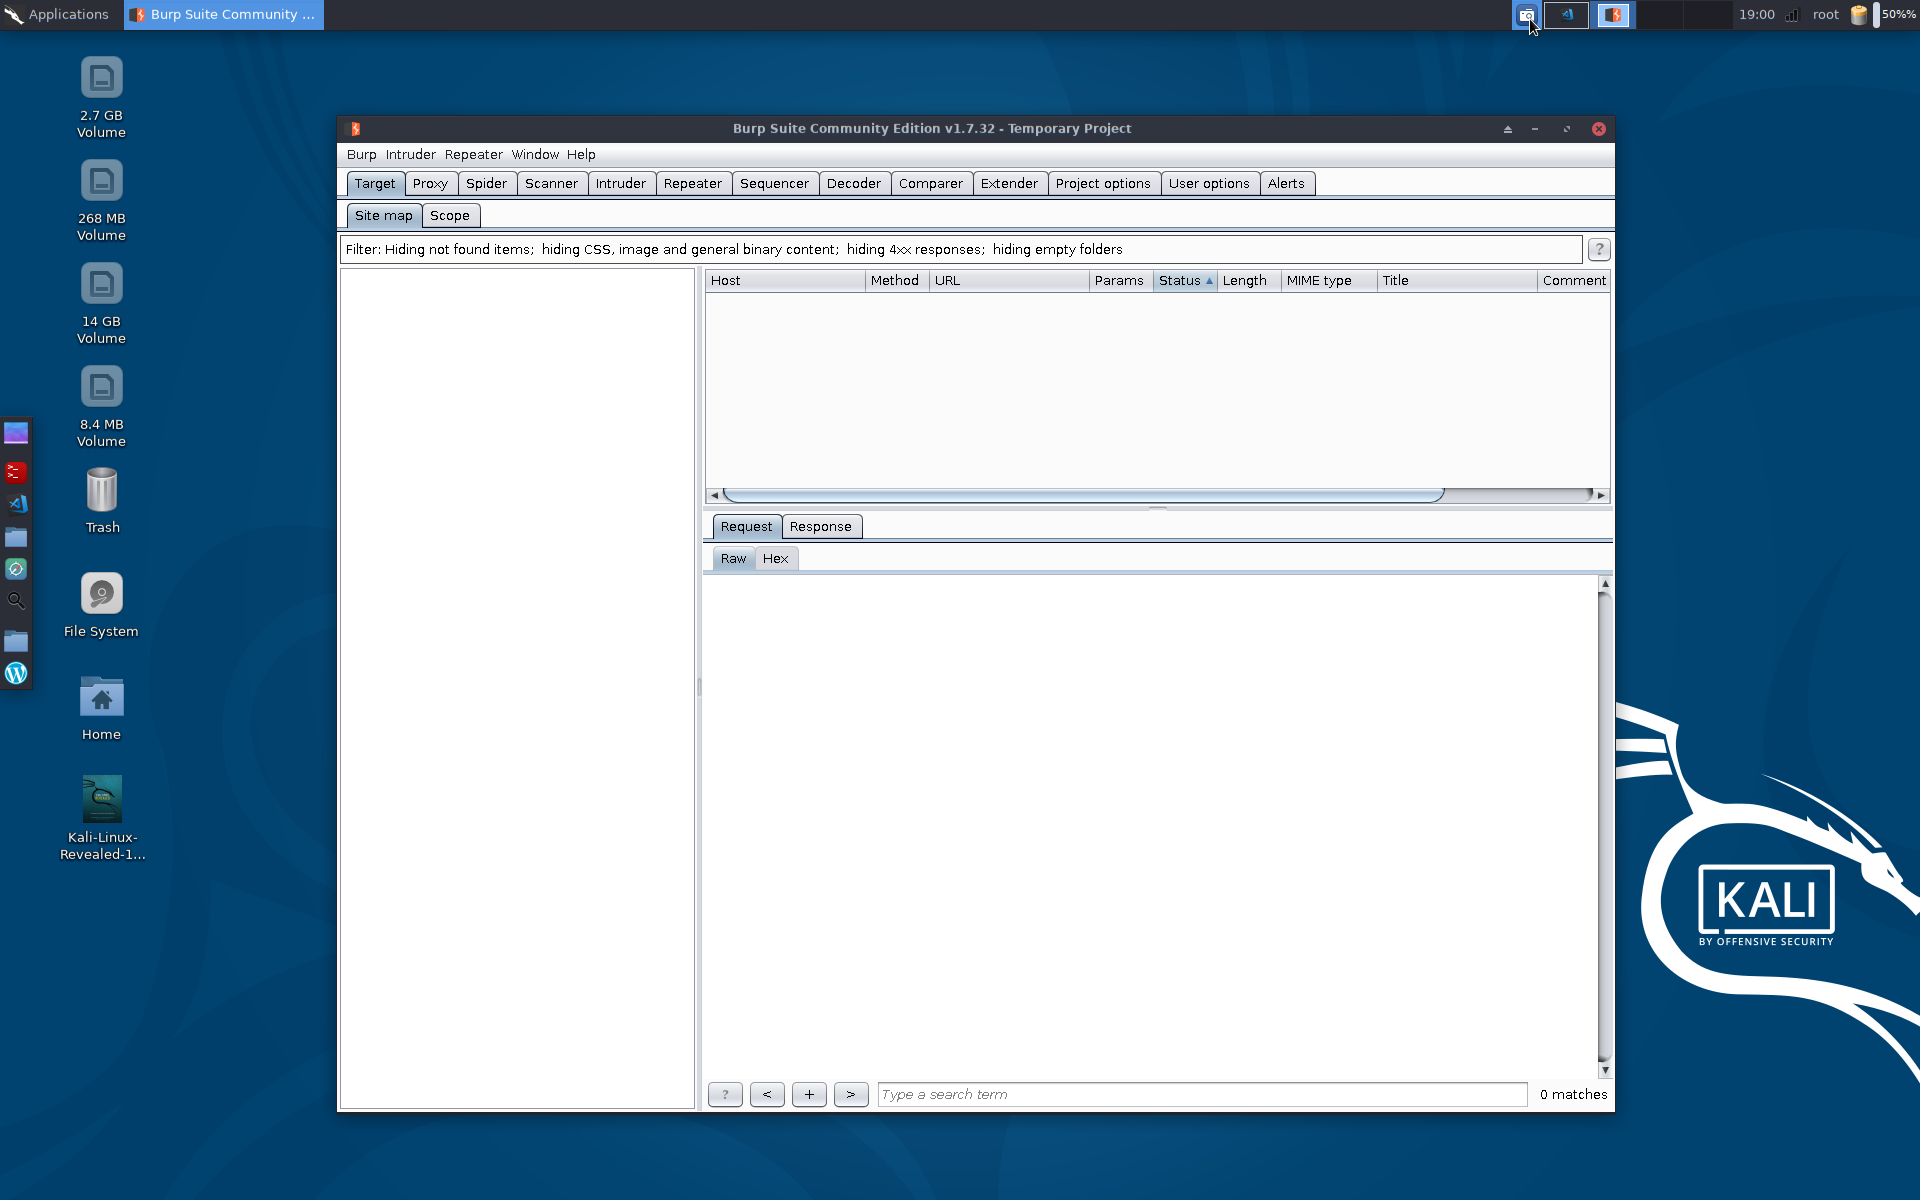
You are now presented with the main interface for burpsuite.
Burp as an HTTP Proxy
One of the most used features in burp suite is the http proxy. This allows you to record, modify, playback and explore individual http requests. As a starting point in this tutorial we will be using firefox and manually entering a couple of urls to explore.
You’ll need to set firefox to use a proxy. To do this:
- open FF and go to preferences > advanced > networking > connection [settings] > proxy
- in the “httpp proxy” input box, enter 127.0.0.1 as the I address and “8080” as the “port”.
- tick the checkbox for “use for all protocols” (for the purposes of this tutorial we want to send everything to burpsuite)
Burpsuite beginners tutorial – SSL certificates
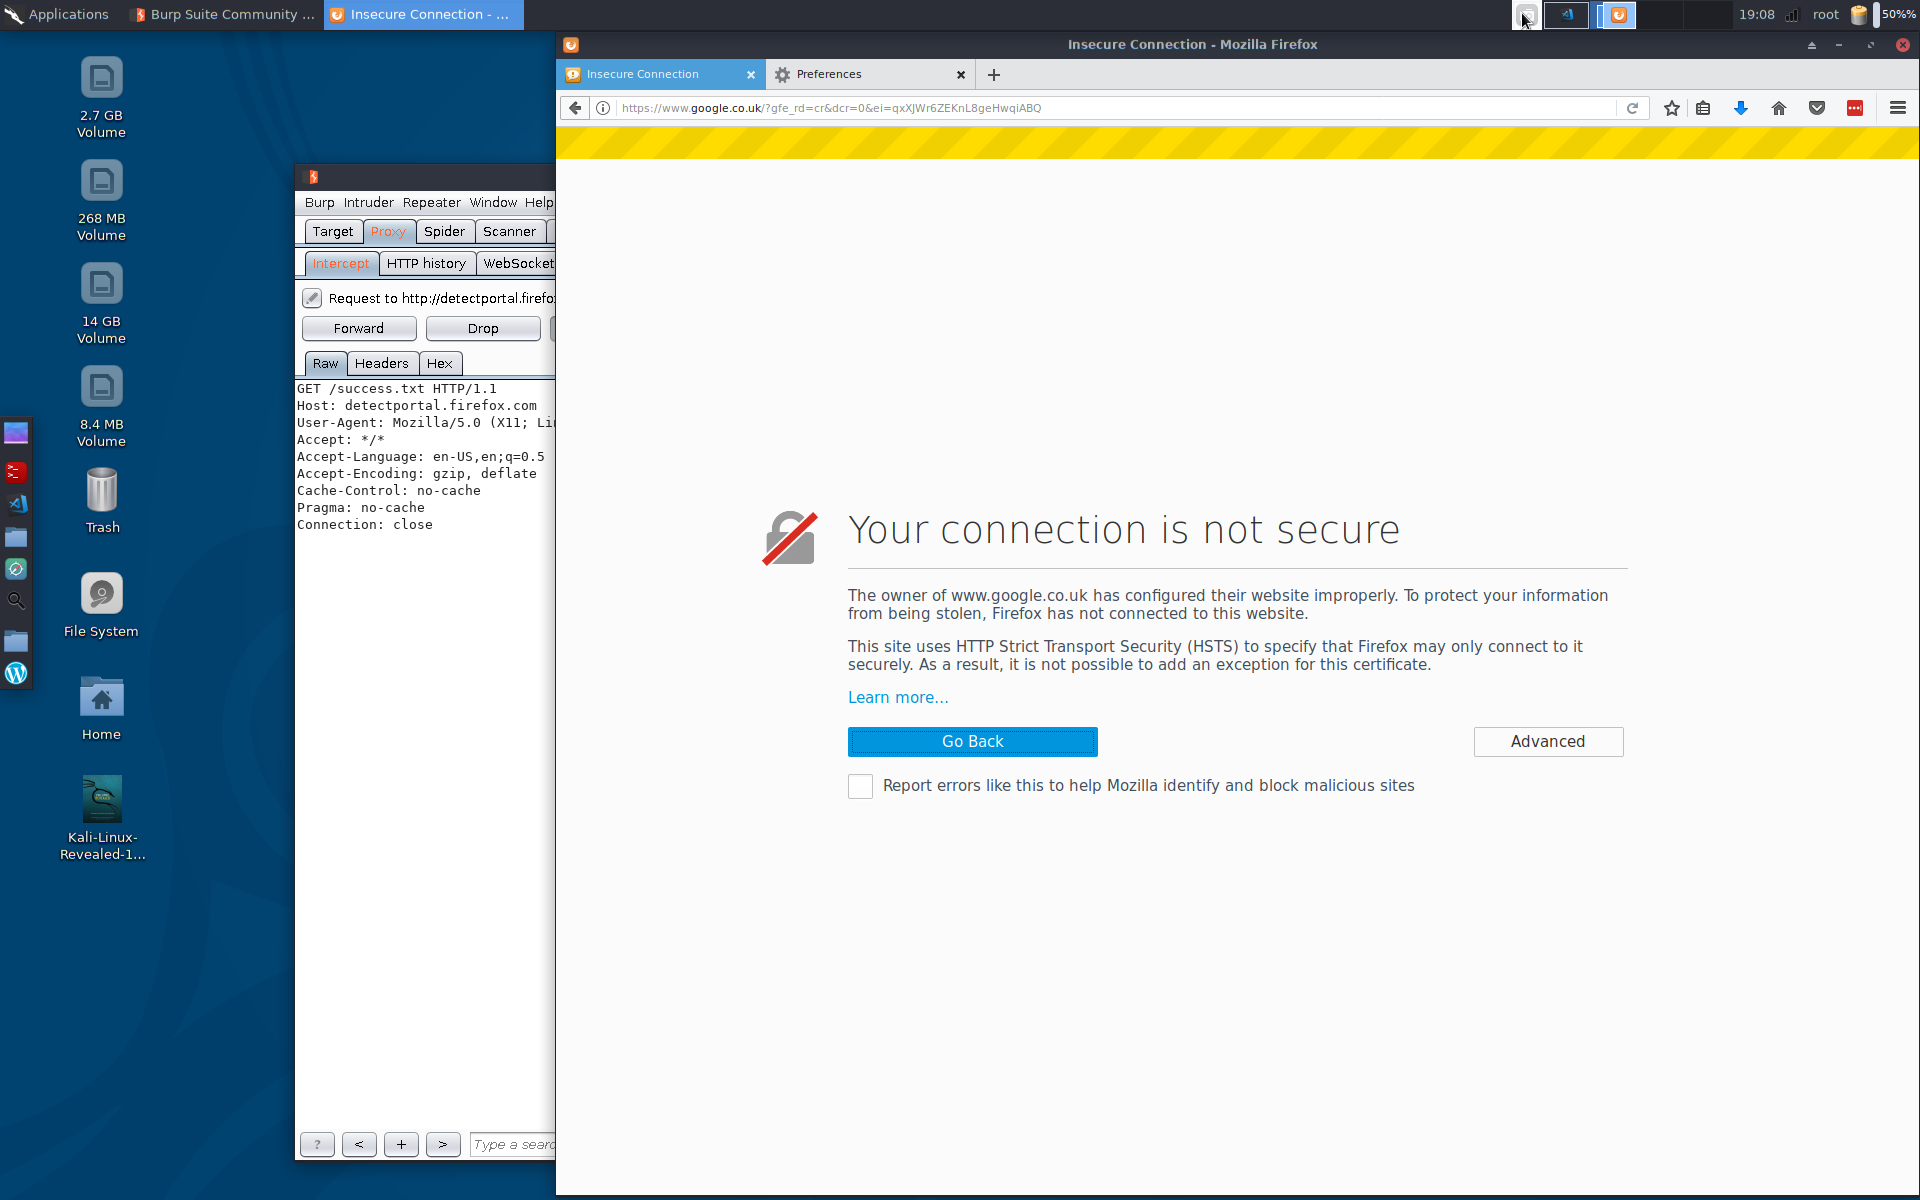
If we went now and tried to go to a site configured with SSL (eg google.com) we would get an invalid ssl cert error,
So, following: https://support.portswigger.net/customer/portal/articles/1783075-installing-burp-s-ca-certificate-in-your-browser we will install burp’s CA in our browser.
- goto https://burp in firefox
- click on ‘CA Certificate’ in the top mennu bar
- click ‘save’
- goto Firefox > preferences > Advanced > certificates > view certificates > authorities > import
- browse to where you downloaded the CA bundle.
- Tick all the options.
- click OK
- In the addressbar in firefox, enter “google.com” and switch over to burpsuite.
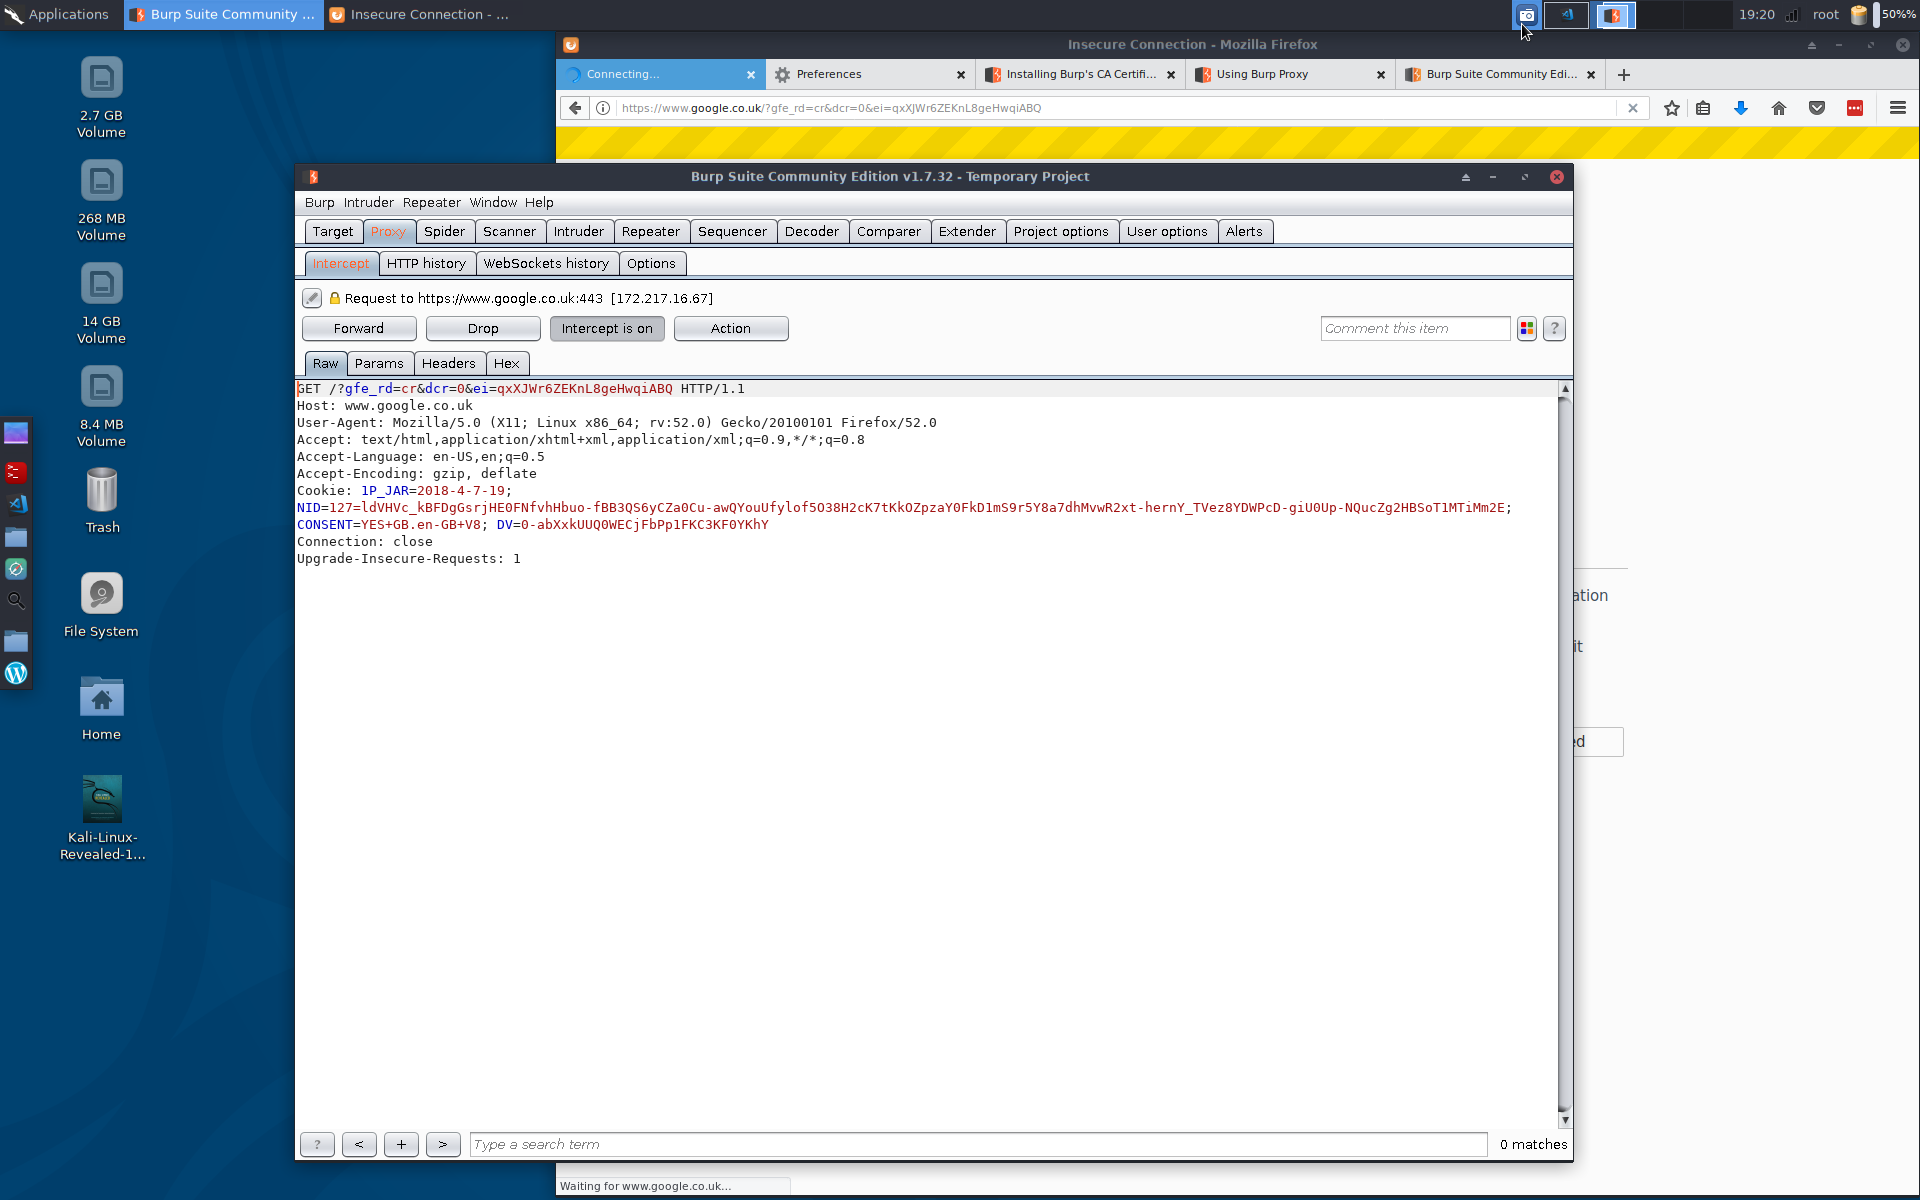
You may have a few captures for ‘firefox profile tracing’ – you can drop those by clicking the ‘drop’ button
In the burpsuite tabs you can see the http headers, http parameters and the hex vaues if you need to (similar to the firefox inspector, but prior to the request being filled by the server)
- at this point, nothing has been sent to the remote server!
- click ‘forward’
- the request is sent to the server
- You now have to switch to the ‘http history tab’
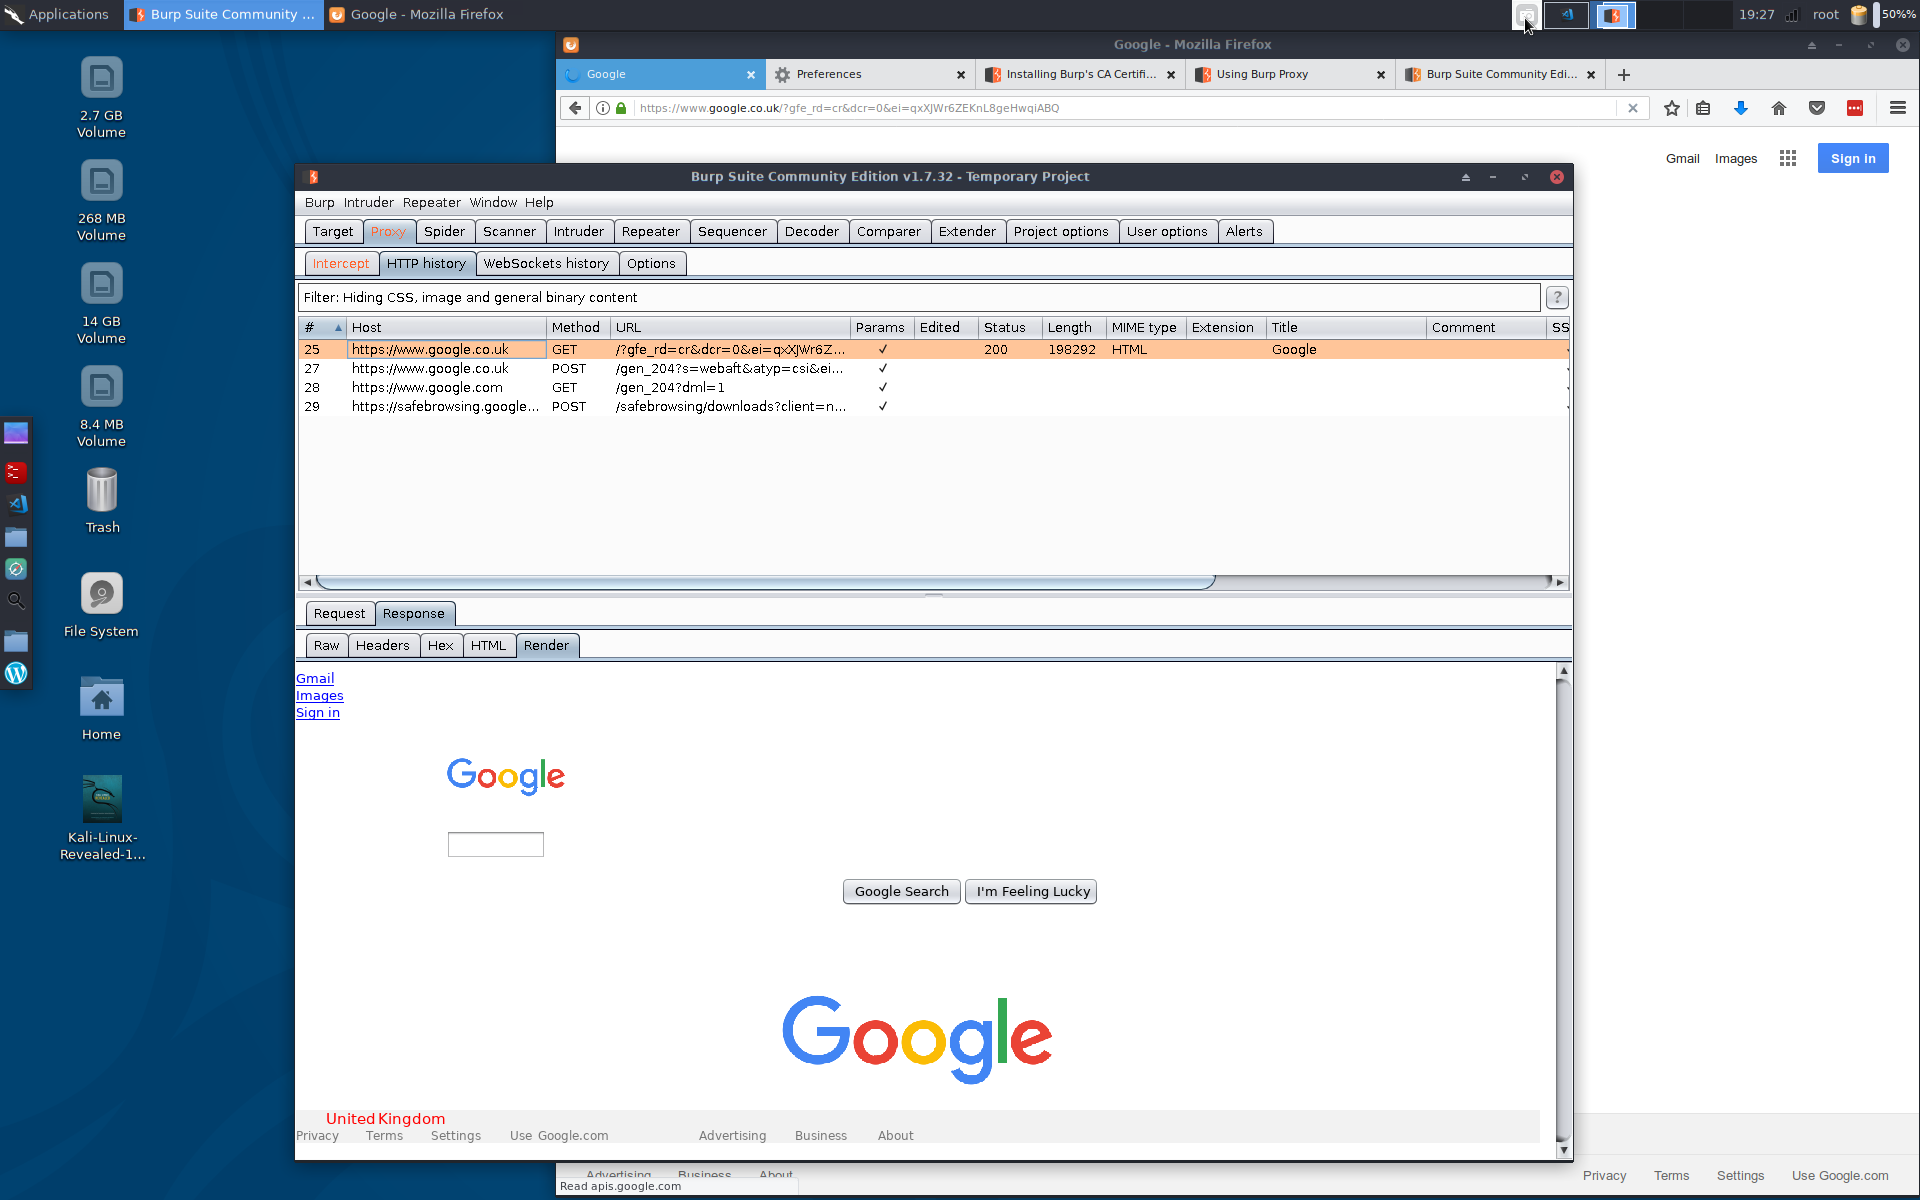
You can see the request that was sent, and also a tab with ‘response’ (there is a ‘raw’ output, and also a ‘render’ output – the render is very useful when looking for blindSQL)
Burpsuite beginners tutorial – Performing an attack
At this point you have the basics of burp. From here you can start on the advanced techniques (tbh upto this point we havent actually done anything yet, we just intercepted a request and forwarded it to the server) so, I’ll quickly show you how to intercept a request and modify it:
“***** WARNING – IF YOU DO ANYTHING OTHER THAN TEST AGAINST YOUR LOCAL VAGRANT INSTALL OF DVWA THEN I AM NOT RESPONSIBLE AND YOU WILL GET CAUGHT, I AM NOT ADVOCATING ATTACKING ANYONE, I AM DEMONSTRATING MODIFYIG A REQUEST PARAMETER AGAINST A LOCAL DVWA INSTALL FOR A BASIC QUERY FOR THE PURPOSES OF EDUCATING THE READER TO ENABLE HIM/HER/THEY TO TEST AND SECURE THEIR OWN SYSTEMS*********
***** if its your own service, or a vagrant box running in localhost, go ahead and try to break it *******
At this stage burpsuite is ready to go, but we have nothing to safely test against.
Follow my instructions for setting up a local dvwa vagrant installation to safely perform all the following actions (if you set dvwa security to ‘impossible’ mode the attack here will fail, if its set to ‘low’)
- clear your current session in burp (quit burp and re-open)
- set your firefox proxy to none, navigate to https://ip.address.of.dvwa.install/dvwa -verify its working
- set your firefox to use burp as a proxy again
Scope
At this stage it is worth setting a ‘scope’ – currently we are logging everything from firefox into burp. This can become overwhelming fast!
- navigate to https://ip.address.of.dvwa.install/dvwa
- click ‘forward’ in the proxy tab of burpsuite
- to set a scope, right click on the line in the history section for the dvwa request and select ‘add to scope’
- click yes when burp asks if you want to ignore requests out-of-scope
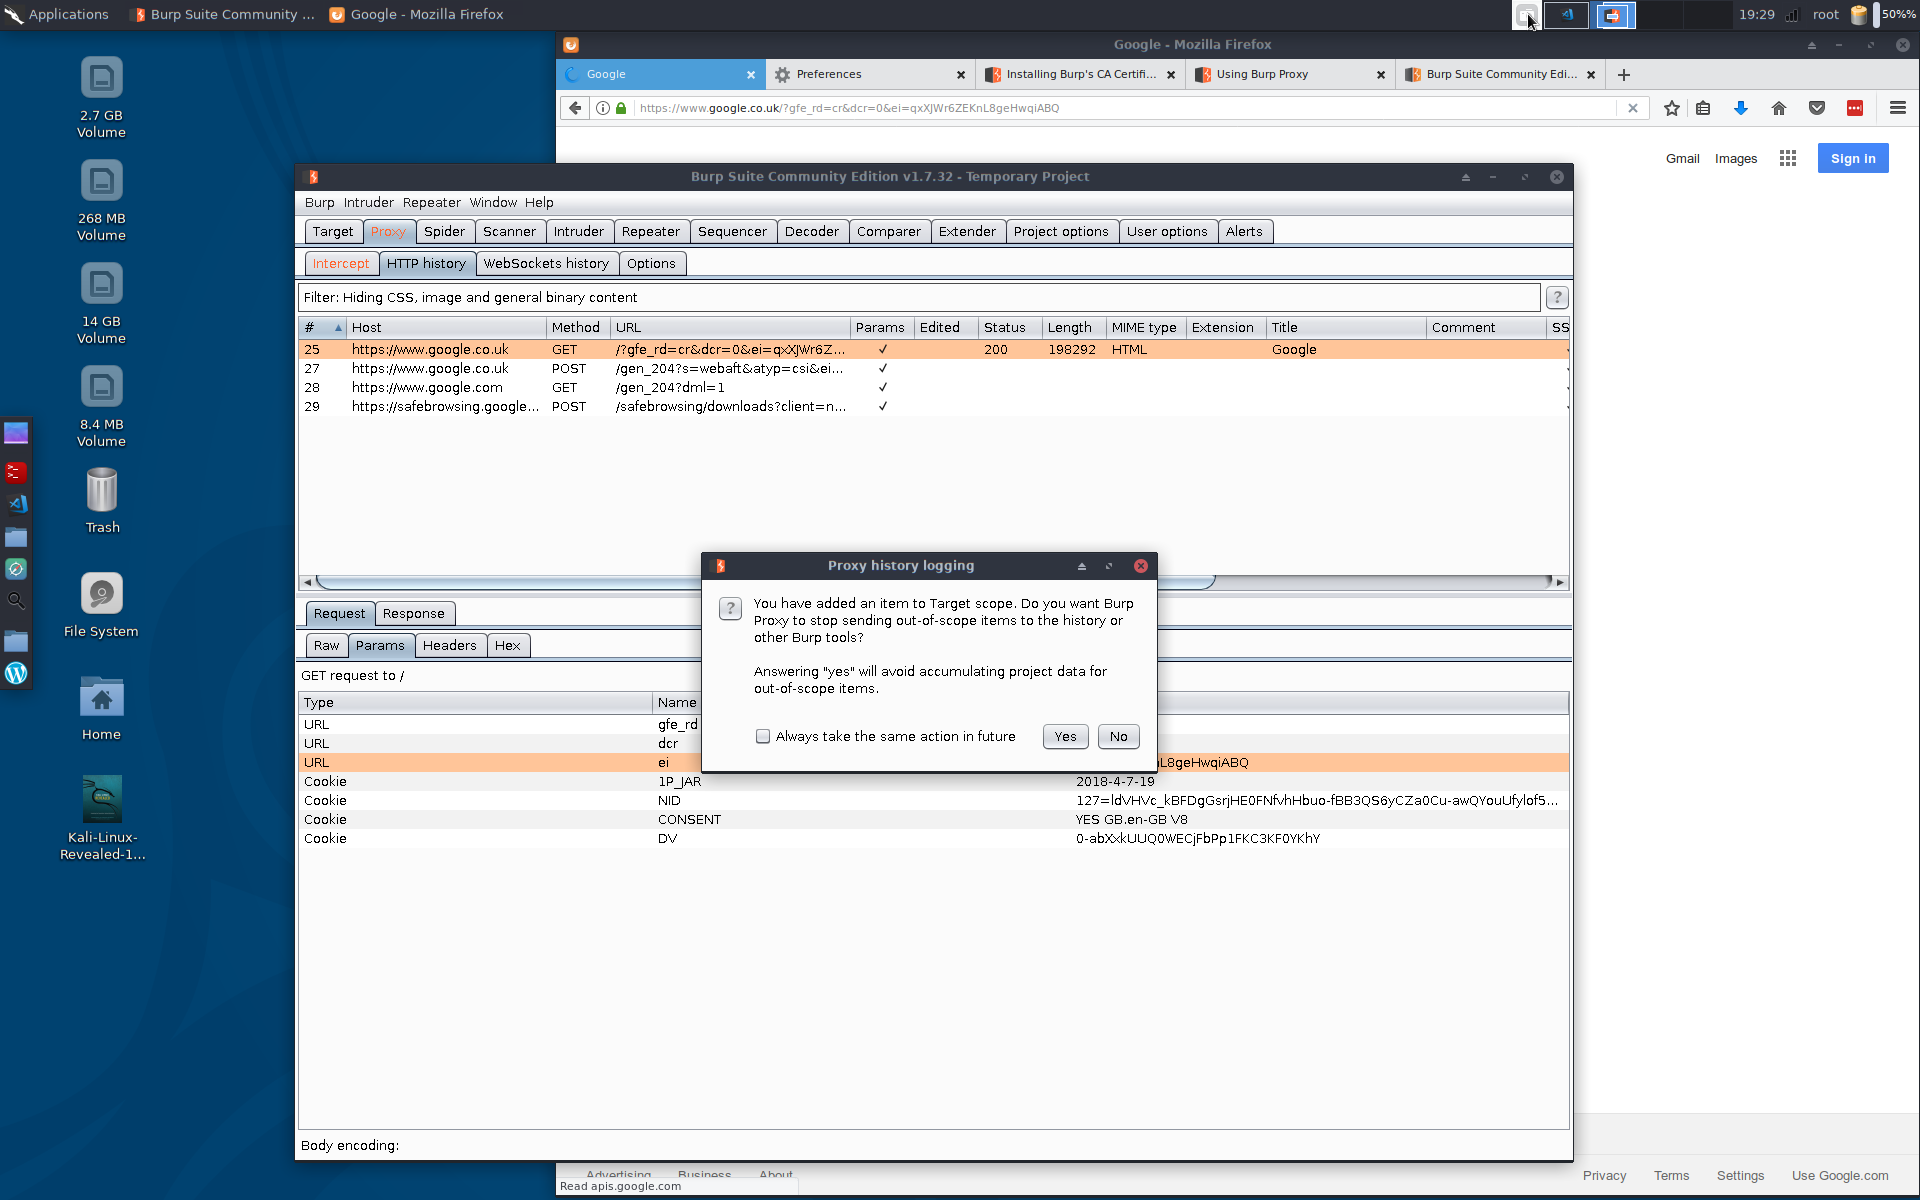
This now means that we are only collecting urls for our dvwa install.
Going further

- go back to the dvwa page in firefox (the login page should have loaded)
- type ‘admin’ into the username box and ‘login’ in the password box. press enter;
- switch to burpsuite
- open the proxy > intercept tab
- you’ll notice a request for dvwa with the parameter ‘username’ having a value of ‘admin
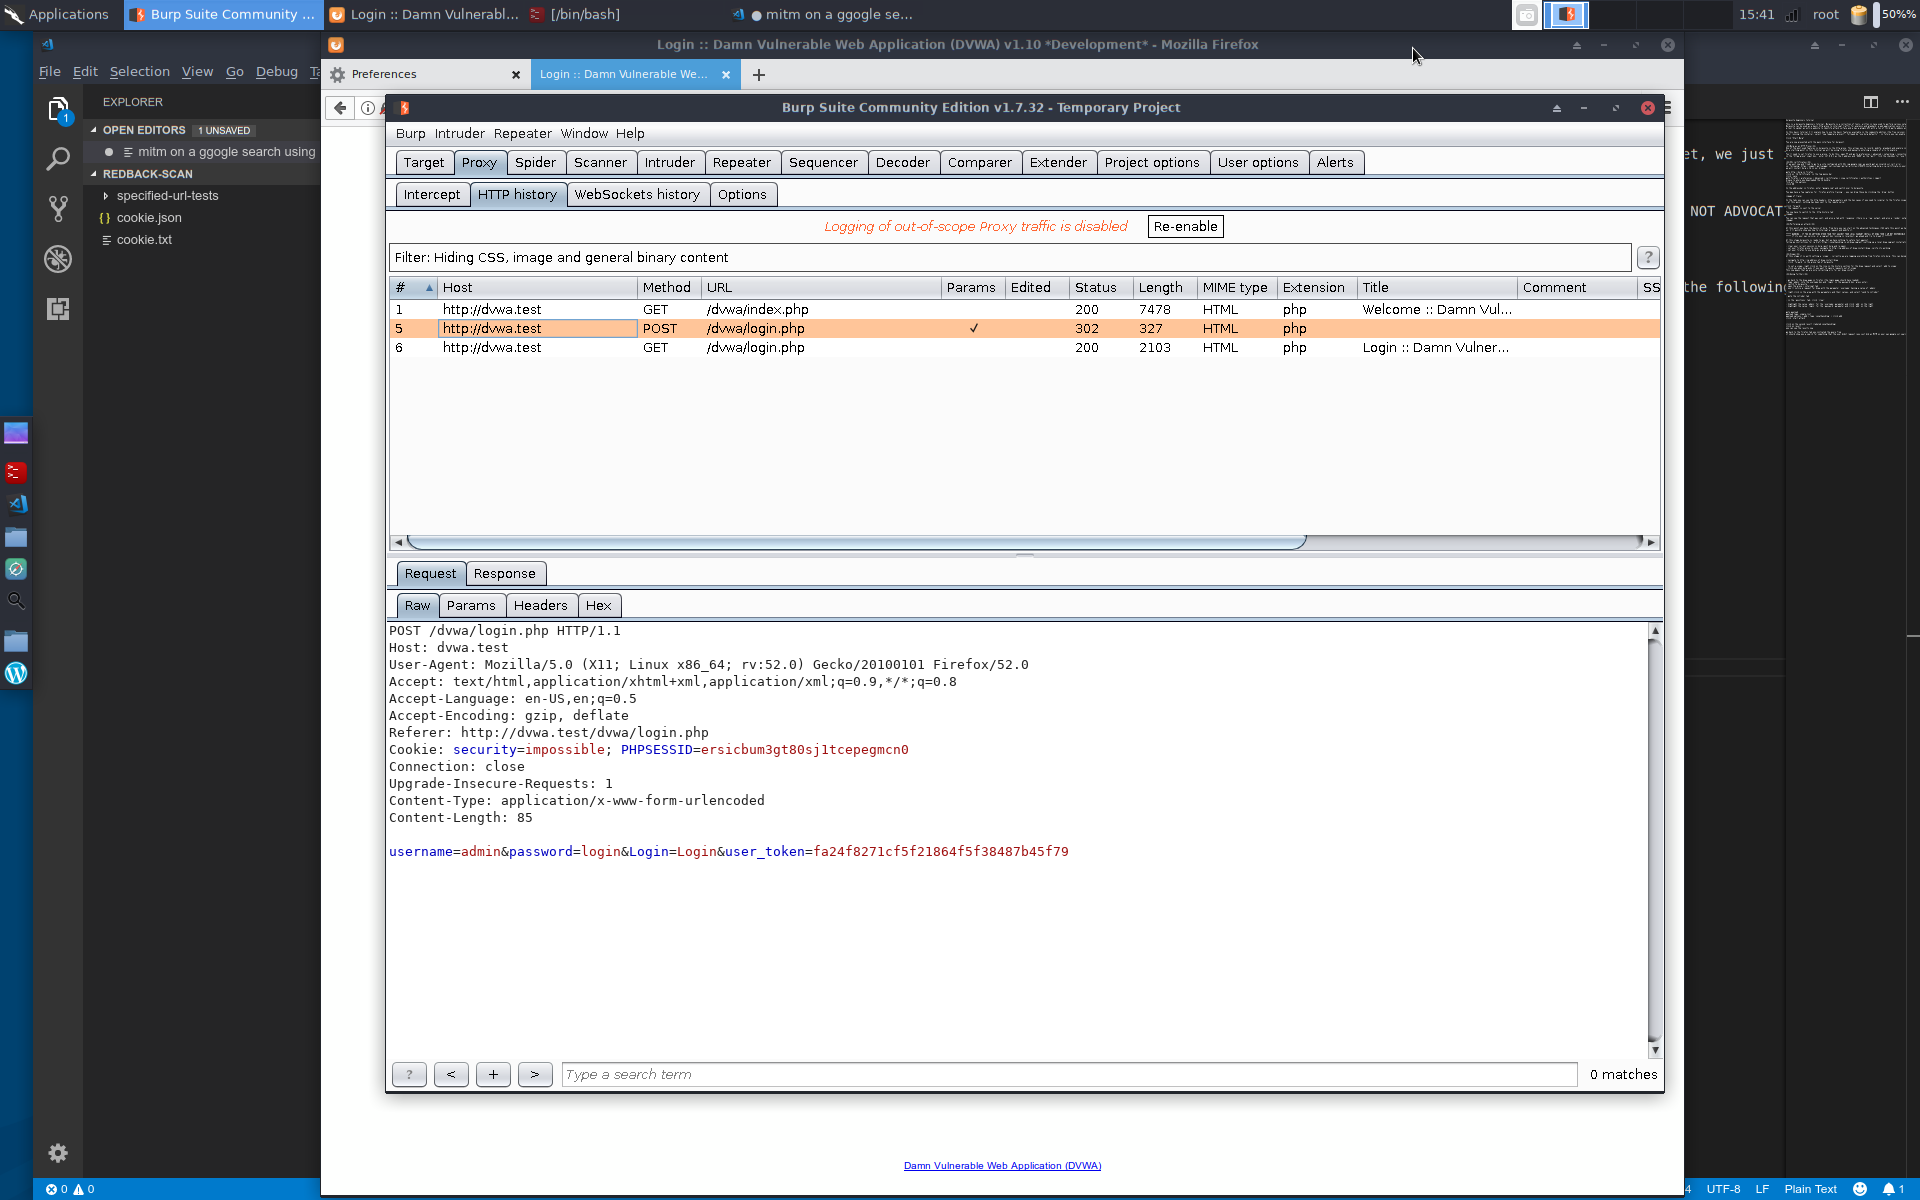
- right-click in the area with the parameters and their values, and select “send to intruder”
- goto the intruder tab
- in the ‘positions’ tab, click ‘clear’
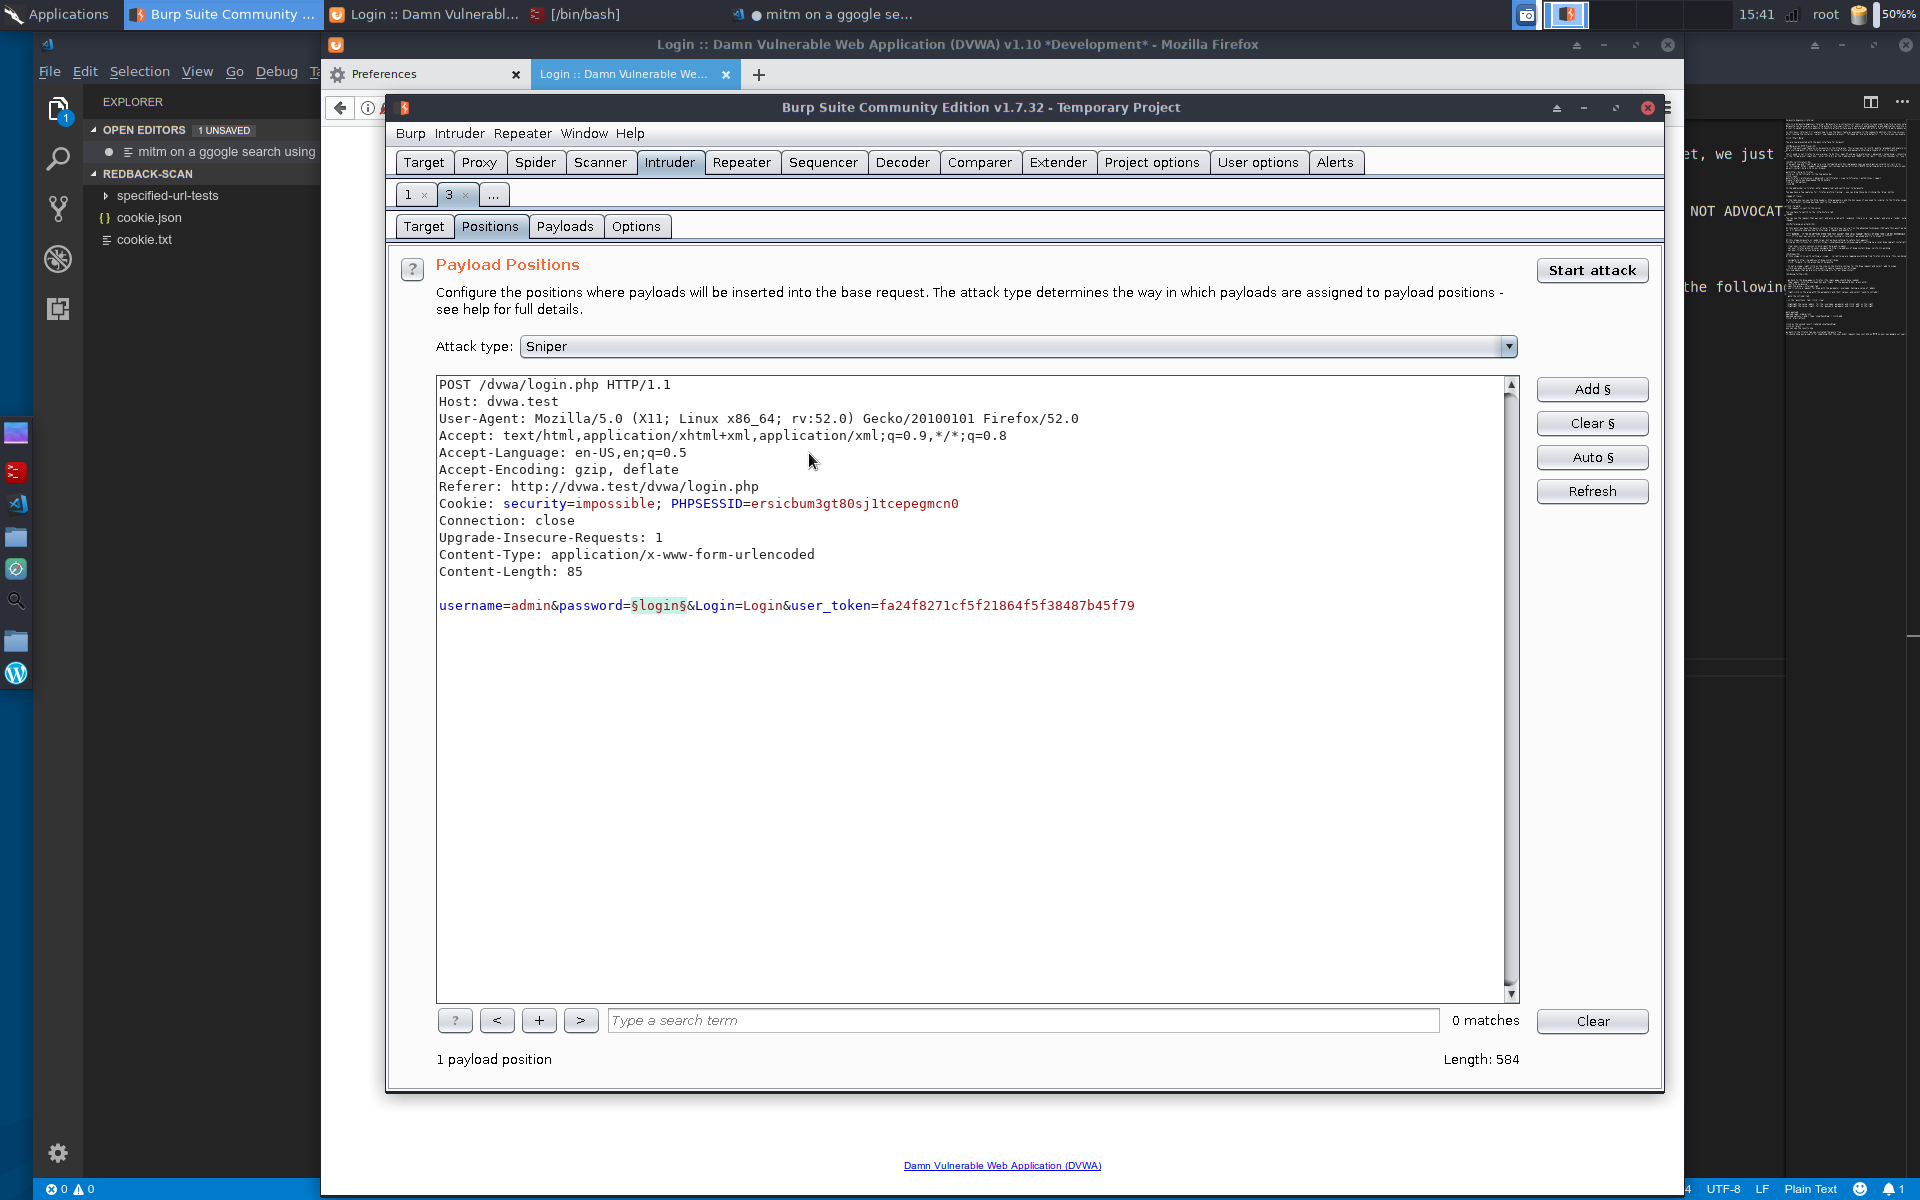
- highlight the value ‘login’ for the ‘password’ parameter and click ‘add’ on the right.
- goto payloads
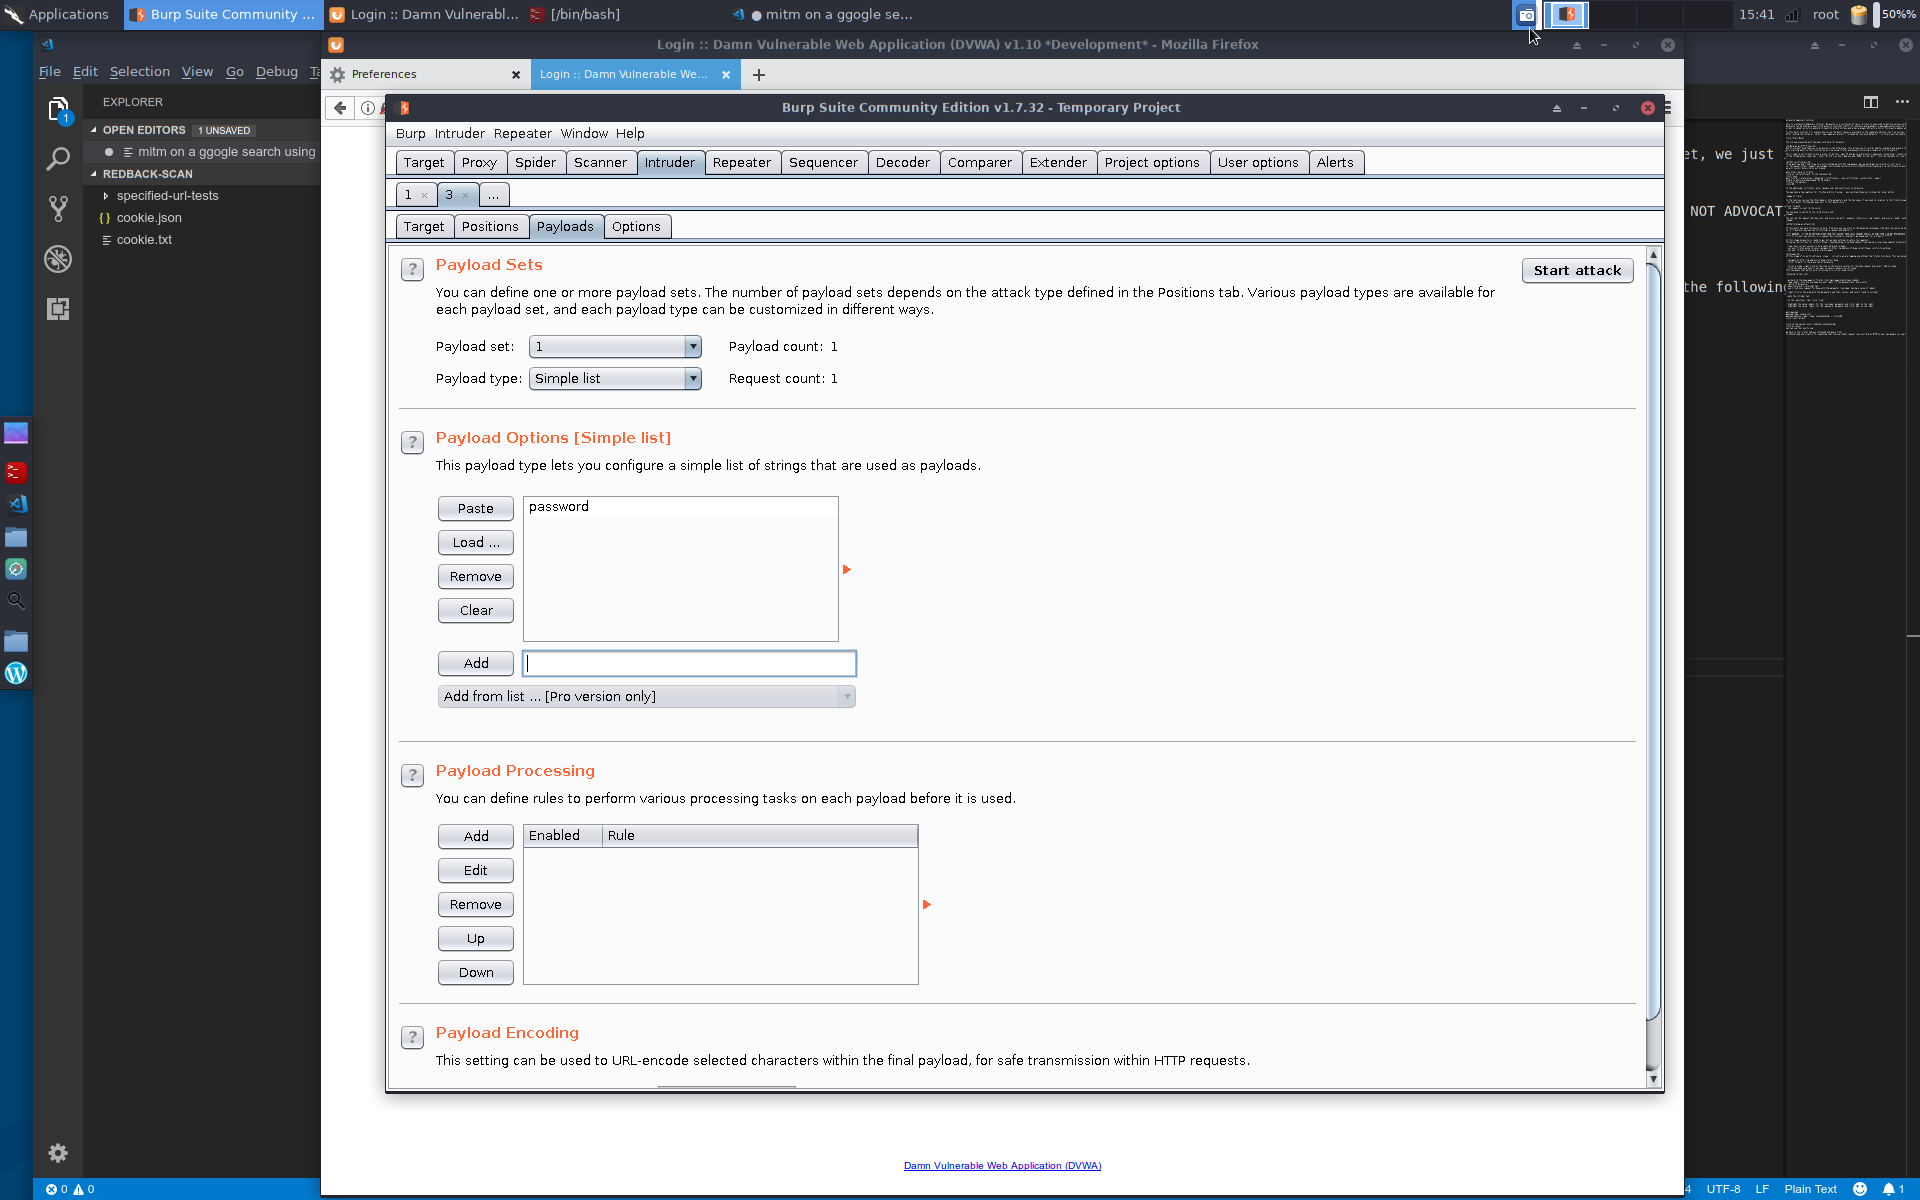
- payload type: simple-list
- payload options > add > type ‘password’ > click add
- click ‘start attack’
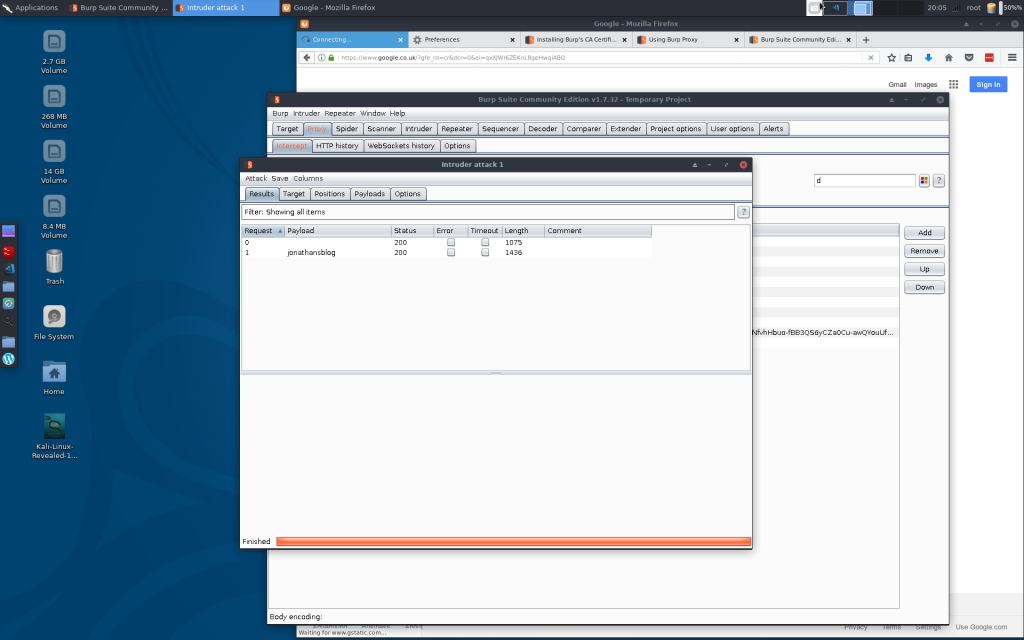
- click on request 1
- click on result
- you can see the results now
- if it shows a 302 redirect to the login page, our attack was unsuccessful
- if it shows a 302 redirect to the index page, our attack was successful
- go back to the firefox tab you initiated the query from
if you set dvwa in imposible security mode you should now see that the request failed because the csrf token did not match!
if you set dvwa in low security mode you should see the control panel
I hope you enjoyed this burpsuite beginners tutorial!
Leave a Reply
You must be logged in to post a comment.